
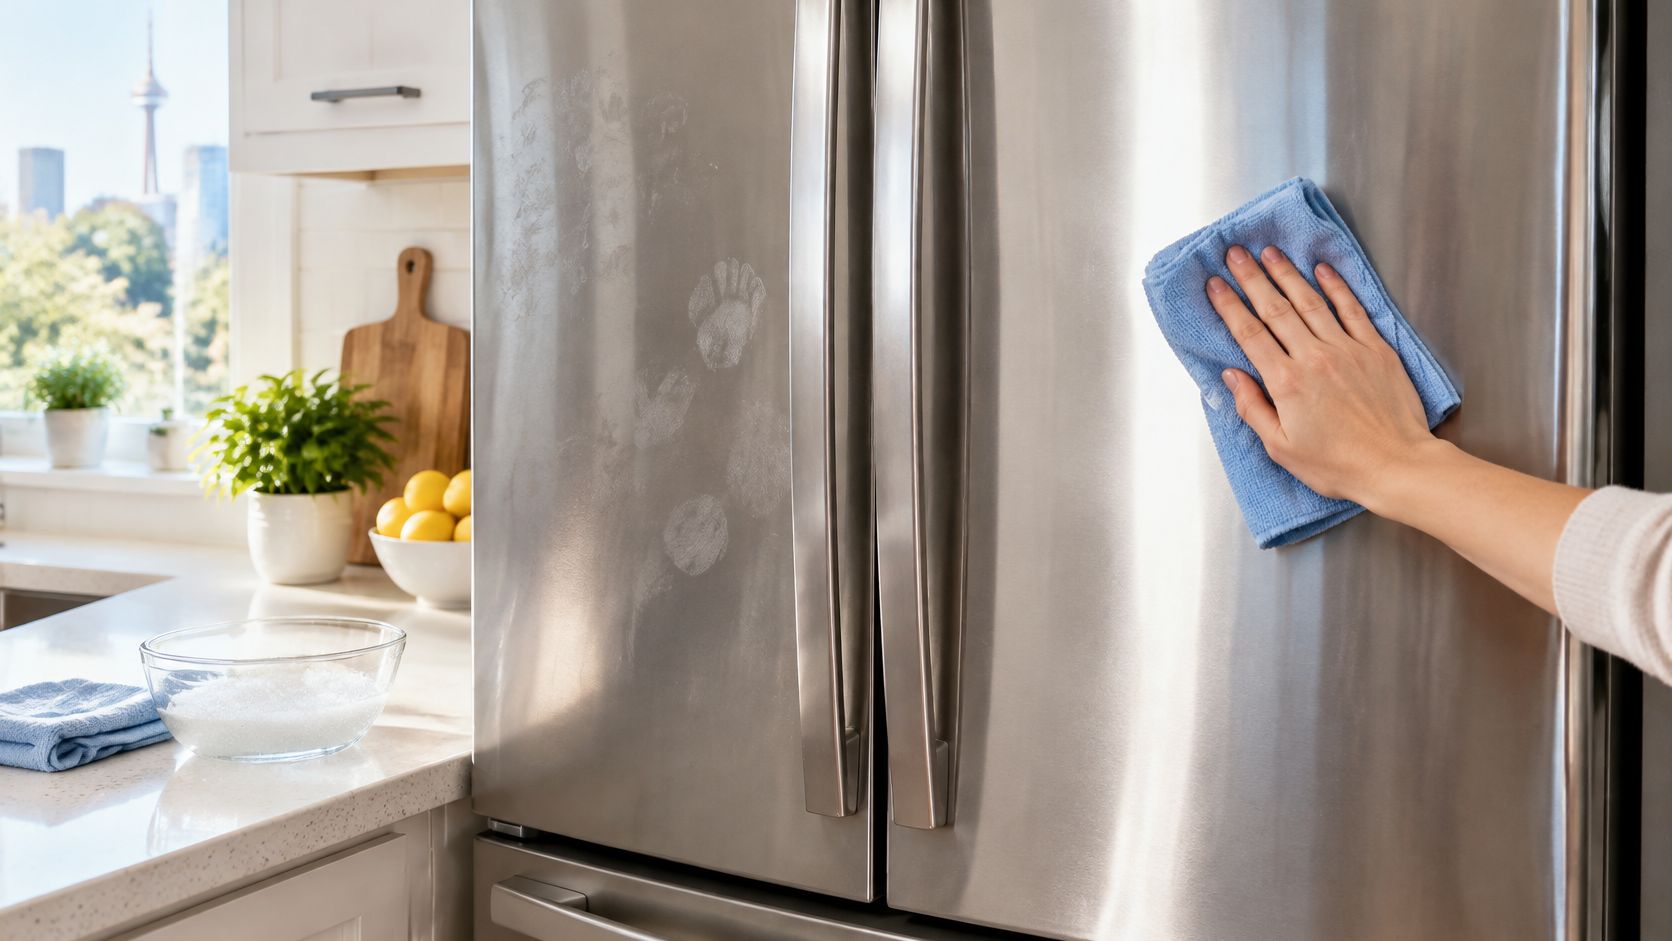
Vinegar followed by oil isn't a universal recipe for a clean stainless steel fridge. It can leave you polishing over grease, treating a coated finish with an unsuitable acid, or chasing mineral marks with more cleaner when the issue is your rinse water.
The reliable approach is less dramatic: remove soil with mild soap, rinse away the soap, and dry the surface before water leaves marks. Keep exterior appearance separate from interior food safety, and don't mistake a scratched finish for something a stronger product can fix.
Table of Contents
- Cleaners That Are Safe on Stainless Fridges
- How to Wash the Fridge Exterior
- How to Clean the Fridge Interior
- Streaks Scale and Cloudy Door Marks
- Polish the Grain Without New Scratches
- Set a Small-Kitchen Cleaning Rhythm
Cleaners That Are Safe on Stainless Fridges
Start with the least aggressive cleaner that removes the soil. Fingerprints and cooking grease usually need a little dish soap, not a specialist polish. Before buying anything, check whether your fridge has bare brushed stainless steel or a fingerprint-resistant coating, because the appliance manual takes priority over generic stainless-steel advice.
A dedicated appliance cleaner can help with persistent exterior fingerprint film, but it's an optional finishing product, not a replacement for washing. Appliance-specific stainless cleaners are sold in several sizes at Canadian hardware and appliance retailers, so compare the price per millilitre before buying, and try soap and water first.
Water hardness matters more than most product labels admit. In many Canadian kitchens, a cloudy mark that survives a soap wash is mineral film from the rinse water, not leftover grease, which is why the table below separates a diluted-vinegar option from a simple distilled-water final wipe.
Safe and unsafe products for a stainless fridge
| Product or tool | Exterior | Interior | Main risk |
|---|---|---|---|
| Microfiber and a few drops of mild dish soap | Yes | Yes | Too much soap dries as haze |
| Clean warm-water rinse | Yes | Yes | Left wet, it spots |
| Distilled or softened water final wipe | Yes | Yes | None if the cloth is only damp |
| Fragrance-free stainless appliance cleaner, thin coat | Yes, when approved for the finish | No | Residue if sprayed into seams |
| Diluted white vinegar | Mineral film only, if the manual allows acid | Rinse well; use only on compatible parts | Not for finishes that specify a neutral cleaner |
| Bleach, 5 mL in 750 mL water, as described in Health Canada's healthy-home guide | No routine use | Sanitizer after washing, then rinse; confirm surface compatibility | Discolours steel; never mix with vinegar or ammonia |
| Stainless oil or appliance polish | Broad panels only, if approved | No | Slippery handles and food-contact residue |
| Baking soda paste | No | Spot use on compatible plastic or glass only | Abrasive on the metal finish |
| Steel wool, green pads, powdered cleanser | No | No | Scratches and pits that hold soil |
| Undiluted bleach or chlorine spray | No | No | Discolouration and residue |
Fragrance-free doesn't automatically mean food-contact safe. Keep exterior stainless cleaners away from shelves, drawers, door pockets, and exposed food. Likewise, a sanitizer suitable for a kitchen work surface isn't automatically suitable for every refrigerator liner, metal trim, or gasket.
Vinegar sits in a narrow lane here. On a bare brushed finish with hard-water spotting, a diluted wipe can dissolve the mineral film that soap leaves behind. On a fingerprint-resistant coating, the same acid can mark the treatment the manufacturer applied to make your life easier, so the manual decides.
Build the kit before opening the door
Gather your supplies on the counter so you're not searching through cupboards with the fridge open:
- Washing cloth: A clean microfiber cloth, free of grit or dried cleaner.
- Rinsing cloth: Another microfiber reserved for removing soap.
- Dry towel: A clean, absorbent towel for the final pass.
- Cleaning solution: Mild dish soap and warm water in a small bowl.
In a hard-water area, add a small jug of distilled water for the final wipe so the rinse doesn't leave new spots while you're still finishing the old ones. Skip heavily perfumed detergents and products with abrasive particles. You're finished when the surface is free of prints, dried food, streaks, and cleaner film, and it feels smooth rather than newly rough or dull.
How to Wash the Fridge Exterior
Wash the outside with the refrigerator door closed. There's no benefit to warming the cabinet while you work on handles and panels, and a closed door gives you a stable surface to wipe.
The Canadian Food Inspection Agency's cleaning and sanitation guidance distinguishes removing soil from sanitizing and stresses product suitability and proper use. At home, that means lifting grease before considering another chemical, not layering cleaner over fingerprints.
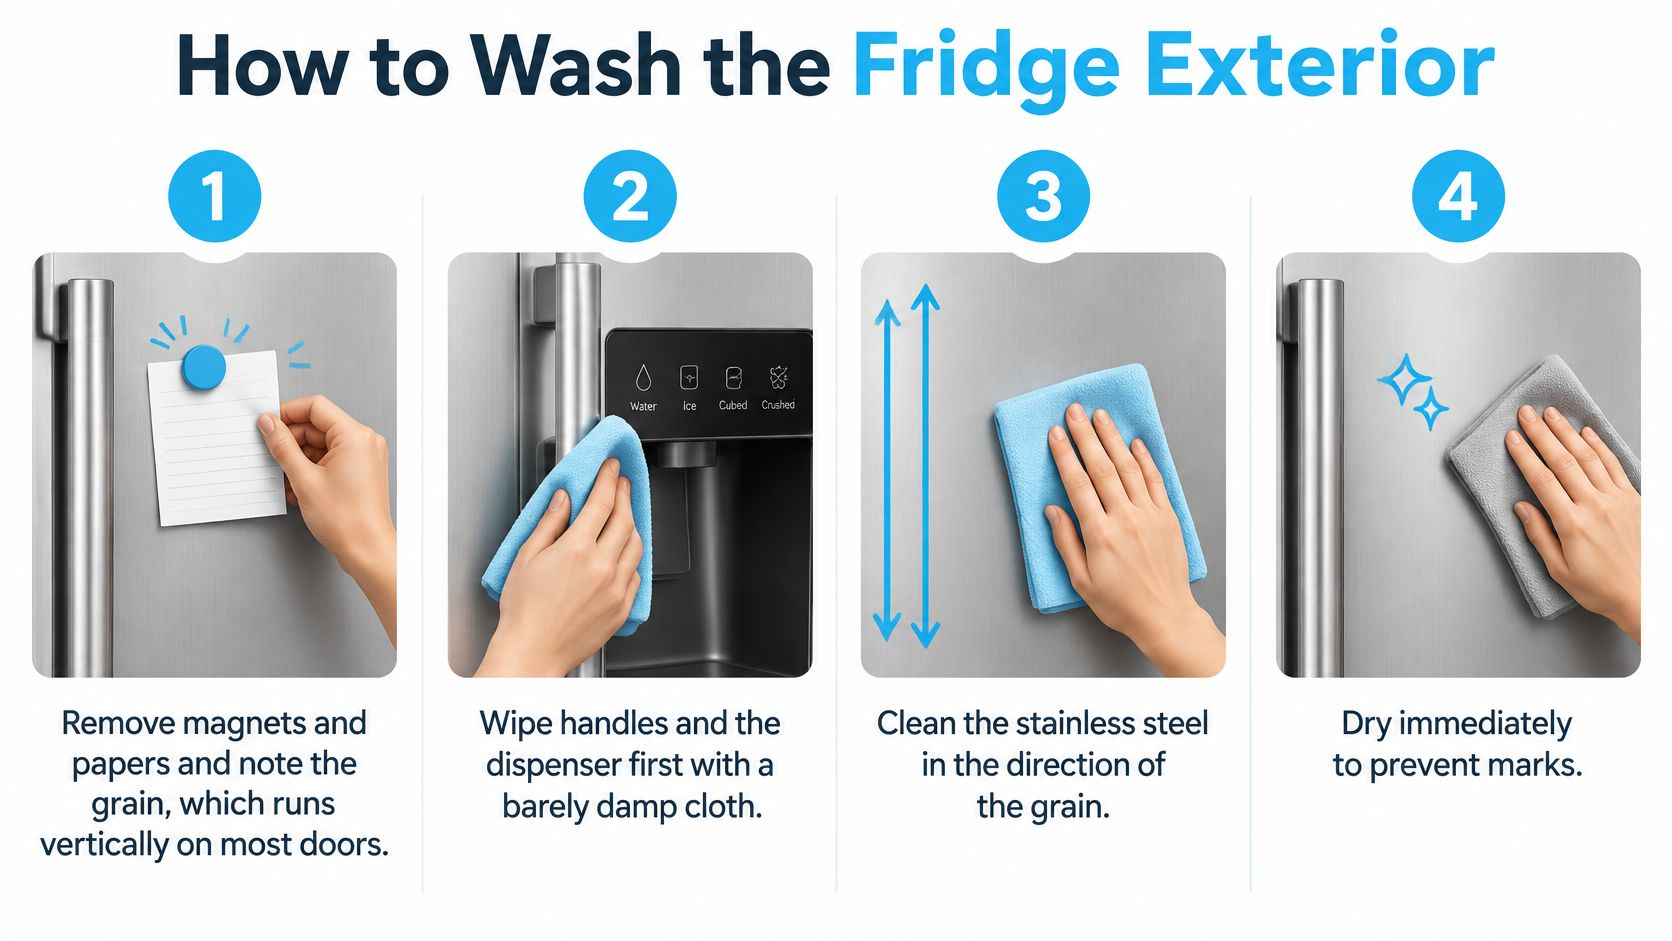
Use this visual sequence to keep the job straightforward.
Wash without flooding the edges
Remove magnets and papers. Lift them away rather than dragging them across the door. Check beneath them for trapped grit, then look closely at the brushed lines to establish the grain direction.
Start with handles and the dispenser surround. Use a barely damp, soapy microfiber to lift hand grease. Keep moisture out of control panels, dispenser openings, seams, and the junction between the handle and door.
Wash from top to bottom. Move the cloth with the grain using light, overlapping passes. This keeps your wiping consistent with the brushed finish rather than leaving obvious crosswise marks.
Remove the soap. Rinse and wring out the rinsing cloth, then wipe the washed area with clean water. A door that looks clean while wet can still dry with a detergent film.
Dry immediately. Follow the grain with the dry towel, including panel edges where droplets collect. Don't let the door air-dry while you start another kitchen task.
Work in manageable areas if you have broad French doors. Washing the entire front before drying gives water more opportunity to leave marks, particularly around recessed handles and dispenser trim.
Deal with what remains gently
Give stubborn fingerprints another soap pass. Use a clean section of cloth rather than pressing harder. If the cloth is carrying grease, extra pressure just spreads it.
Apply an approved stainless cleaner to the cloth. Start with a small dab, spread it thinly, and buff away excess. Never spray directly towards electronics, seams, or the gasket.
Inspect the dry finish in side light. Stop when prints, food specks, streaks, and residue are gone. A newly dull patch is a reason to stop, not an invitation to scrub harder.
Stainless steel's corrosion resistance relies on a thin, chromium-rich protective surface layer. Aggressive scraping can damage the finish, while scratches and pits create places for soil to remain.
Practical rule: If you need force to remove a mark, change the method before increasing the pressure.
For a moving demonstration of exterior wiping, use the video alongside the finish-specific instructions in your manual.
Finish drying the exterior before opening the cabinet for interior work. Keep the wet washing cloth separate from the dry finishing towel so the last pass does not put moisture back.
How to Clean the Fridge Interior
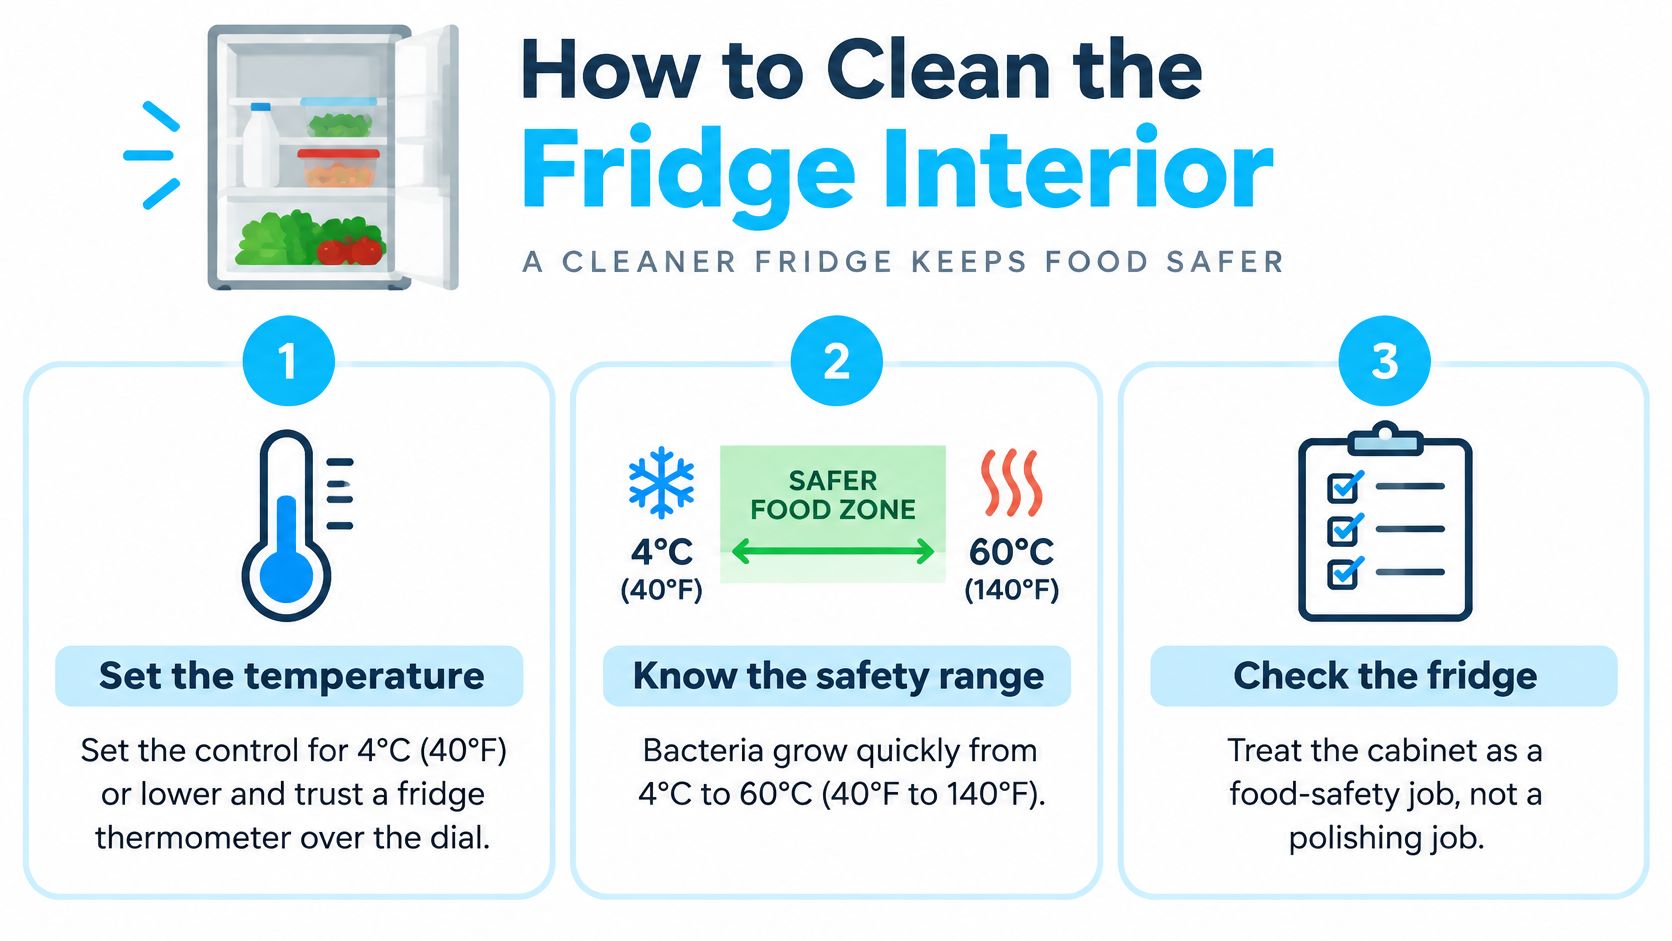
Keep the refrigerator at 4°C (40°F) or lower, checked with a refrigerator thermometer rather than the dial alone; Health Canada's food-safety guidance identifies 4°C to 60°C (40°F to 140°F) as the danger zone and says perishables and leftovers should be refrigerated within two hours. That's an upper food-handling limit, not a cleaning-time allowance to use up.
Treat the cabinet as a food-safety job, not a polishing job. Have a cooler ready before unloading, especially if you're removing all the shelves rather than wiping a local spill.
Keep these temperature priorities visible while you work.
Unload and wash in controlled stages
Move food into cold storage. Transfer perishables to a cooler with ice packs and close the fridge between loads. Keep raw meat, poultry, fish, and seafood sealed and separate from ready-to-eat food.
Remove shelves and bins carefully. Empty door pockets before lifting them out, and check how supports release instead of forcing a stuck fitting. Let cold glass lose its chill before exposing it to warm washing water.
Wash detachable parts separately. Use warm soapy water, rinse thoroughly, and let them air-dry completely. Don't assume shelves or drawer fronts are dishwasher-safe unless the manual says so.
Wipe the cabinet from top to bottom. Use a fresh cloth and pay attention to shelf supports, drawer runners, gasket folds, and the space beneath crisper bins. Remove crumbs before wiping so they don't collect in corners.
For an isolated spill, remove only what blocks access. A small, targeted clean is preferable to emptying the whole appliance and leaving the door open unnecessarily.
Sanitize where contamination calls for it
Treat raw-meat or seafood leakage as contamination. Wash away the spill first, then use a sanitizer labelled for the intended food-contact surface and compatible with the fridge materials. Follow its dilution and contact-time instructions, then rinse as directed.
Keep chemicals separate. Never mix bleach with vinegar, ammonia, or other cleaners. Remove washing residue before applying a compatible sanitizer, and don't leave chemical film on shelves.
Change dirty cloths promptly. A cloth that has wiped a raw-meat leak shouldn't move on to the butter compartment. Keep floor-cleaning tools completely separate from food-contact parts.
Reassemble dry and restore cold storage. Refit dry shelves and bins, close the door, and confirm that the thermometer shows a suitably cold cabinet before returning food from the cooler. Store sealed raw foods on the bottom shelf where leaks won't drip onto other items.
If clearing out the fridge reveals more food than you'll use, this guide to vacuum sealing and freezing food in Canada can help organise freezer storage. Packaging is a storage tool, though, not a substitute for keeping perishables cold.
Finish by checking beneath drawers and around shelf brackets, not by adding fragrance. A clean spill tray or crisper recess matters more to hygiene than a shiny door.
Streaks Scale and Cloudy Door Marks
A pale film left after washing isn't necessarily leftover grease. Your cloth may have removed the fingerprints successfully, then deposited minerals from the rinse water as the door dried.
Health Canada's drinking-water operational-parameters document classifies hardness above 200 mg/L as poor and above 500 mg/L as unacceptable for many domestic uses, and records municipal surveys in which 20% of municipalities exceeded 180 mg/L. These are domestic-use classifications, not refrigerator damage thresholds, but they explain why identical cleaning routines can produce different results.
Fridge door marks, causes and fixes
Use the appearance and texture of the mark to choose the next step. The causes below are likely explanations, not a diagnosis of every coated or damaged finish.
| Symptom | Likely cause | Fix |
|---|---|---|
| Chalky white film | Hard-water mineral deposits | Damp distilled or softened-water wipe, then dry immediately |
| Rainbow patches | Cleaner or oil left on the steel | Plain-water wipe, then dry with the grain |
| Greasy haze | Fingerprints and cooking film | Soap pass first, then water, then dry |
| Long directional streaks | Wiping across the grain or using a dripping cloth | Barely damp microfiber, with the grain only |
| Dull rough patch | Pad, powder, or steel-wool abrasion | Stop abrasives; polish will not fill a scratch |
| Cloudy gasket fold | Soap trapped in the rubber | Damp cloth in the fold, dry, no polish or bleach |
For a practical comparison, imagine cleaning a door beside a busy cooking area. A translucent smear around the handle suggests grease, while pale droplet outlines across an otherwise clean panel suggest water residue. They need different corrections, even though both may look cloudy from across the kitchen.
Change the water before escalating the cleaner
I would try distilled water for the final wipe before buying another bottle of stainless cleaner. Use a fresh cloth, wring it thoroughly, and dry the test area immediately so you can judge the result without another layer of residue.
Softened water can also help where hardness is the issue, but it isn't interchangeable with distilled water: other dissolved material can remain. Don't assume ordinary filtered drinking water has had its hardness removed, either.
A clean door that dries cloudy may need different rinse water, not a stronger detergent.
Private-well households should judge their own water rather than borrowing assumptions from a nearby city supply. If kettle scale and dried tap-water spots are common around your kitchen, changing the final-rinse water is a sensible low-risk test.
Vinegar has a narrower role. Acid can loosen mineral deposits, but repeated or poorly rinsed vinegar use isn't a universal finish treatment, particularly when the manufacturer specifies a neutral cleaner. Use it only where the manual permits it, apply it locally with a cloth, and remove it thoroughly.
Judge the mark again after a corrected wash, rinse, and dry. If it remains, don't automatically call it a scratch, stubborn deposits and coating damage can also persist. A line that catches a fingernail or an area that feels newly rough deserves inspection rather than another round of chemicals.
Polish the Grain Without New Scratches
Polish is optional and cosmetic. Use it only after the door is clean and dry, and only if the manufacturer permits it on that finish. Many fingerprint-resistant surfaces are better left without an added oily layer.
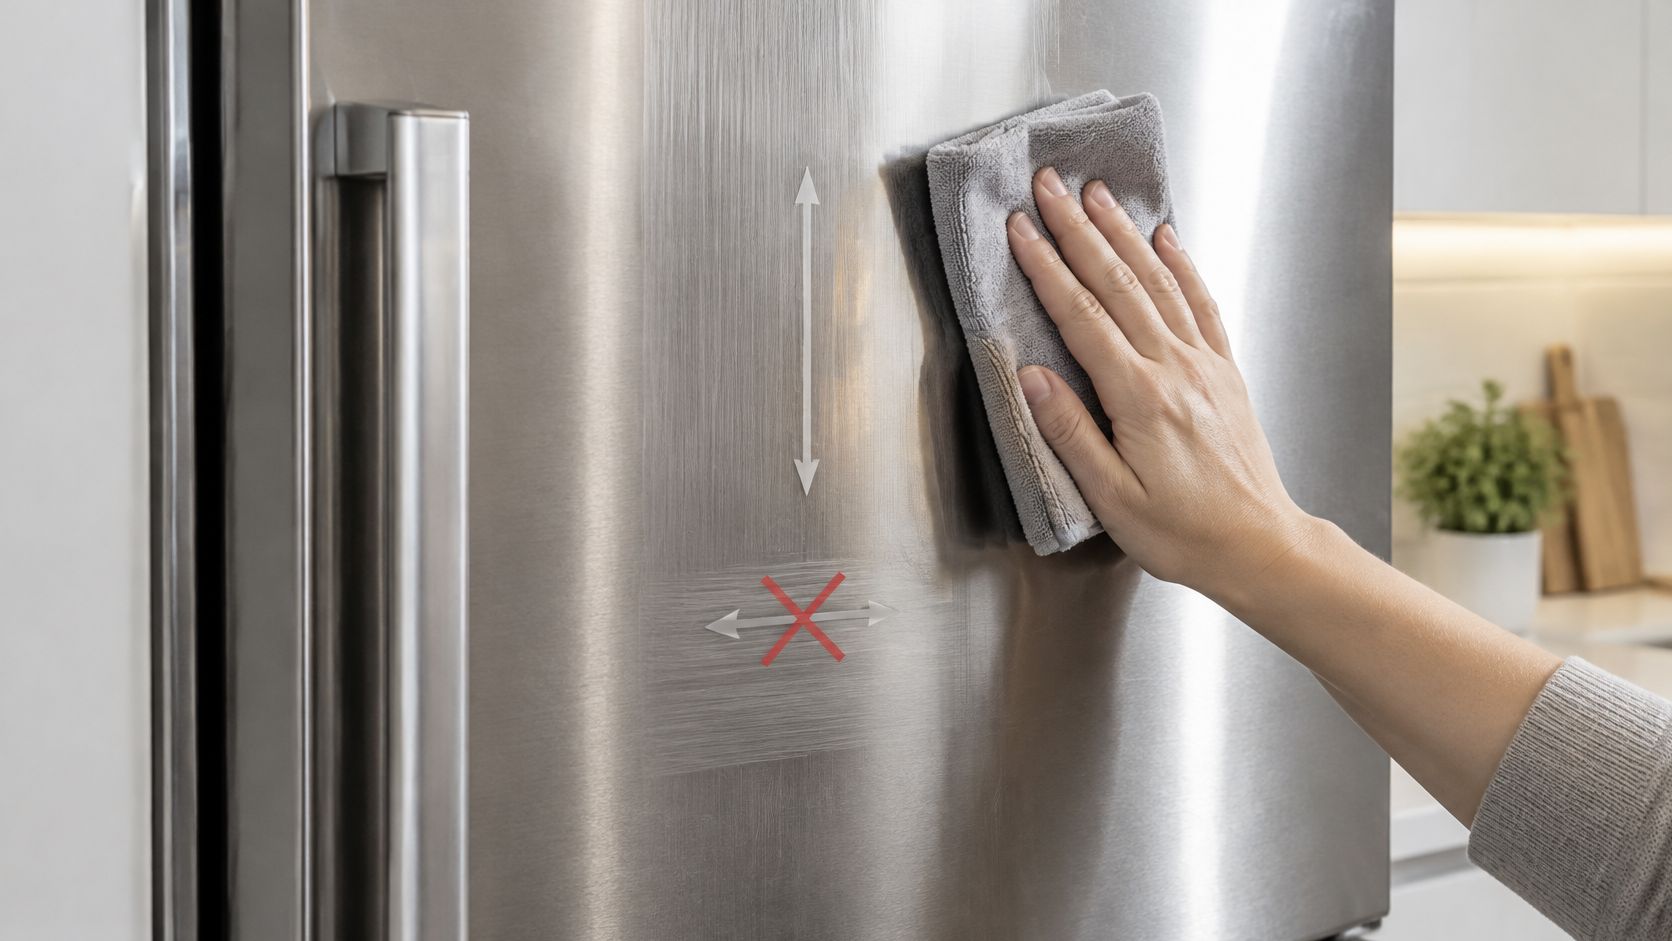
Look at the door in angled light to find its faint brushed lines. They establish your wiping direction; don't assume the door, handles, and side panels all have the same grain.
The cloth should follow those lines rather than moving in circles.
Apply less than you think you need
Put a small drop of manufacturer-approved stainless appliance polish, or mineral oil where permitted, onto a soft cloth. Spread it across a broad panel in a thin, even layer with the grain, then buff with a fresh dry cloth according to the product directions.
The finished surface should look even, not wet or slick. If the cloth leaves obvious oily tracks, remove the excess instead of adding another coat.
- Broad panels: Keep the treatment on suitable stainless door and side surfaces.
- Handles and dispensers: Leave grip areas free of oil so hands don't slide and residue doesn't transfer.
- Trim and seals: Keep polish away from black plastic, rubber, control panels, and door edges.
- Interior parts: Don't bring the polishing cloth into the food-storage compartment.
A dry microfiber buff is often enough for light fingerprints between washes. If the mark smears rather than lifting, stop buffing and remove the grease instead.
Know what polishing cannot repair
For stuck food, soften the deposit with a damp cloth before trying to lift it. A smooth plastic or nylon scraper may help on a compatible surface, but keep its edge flat, avoid force, and stop if it drags against the finish. A razor blade or rough sponge isn't a shortcut.
A light haze of fine scratches may look less noticeable after a careful with-grain buff. That's a change in appearance, not removal of the scratches, and aggressive rubbing can make the surrounding finish uneven.
The distinction matters on other brushed appliances too. This stainless-steel espresso-maker guide offers related appliance context, but cleaning permissions still belong to each product's manufacturer.
If a fingernail catches in the groove, stop treating it as dirt.
Don't attempt to grind a deep scratch away with household abrasives. Live with the mark or ask the manufacturer or an appliance refinisher about panel repair, especially if the door has a coating that local buffing could make more conspicuous.
Set a Small-Kitchen Cleaning Rhythm
A repeatable routine works better than waiting until the fridge needs a complete clear-out. In a condo kitchen, the main constraints are usually counter space, sink access, and somewhere to keep food cold while parts dry.
Wash shelves separately if your sink can't accommodate the whole set. Support bins on a clean towel over the dish rack rather than covering your only food-preparation counter, and don't balance glass shelves where they can slide into the sink.
Organise around space and door time
- Single-sink kitchens: Finish washing and rinsing each removable part before starting the next. Keep a clear landing area for dry pieces.
- Door management: Open, remove what you need, and close. Don't leave the cabinet airing while drawers soak.
- Humid weather: Give bins time to dry outside the cabinet and wipe moisture from gasket folds before reassembly.
- Winter touch-ups: Remove visible dust and handle marks rather than automatically adding more oil.
A secondary fridge deserves the same spill checks as the kitchen appliance. If it lives in a garage or basement, confirm that the location falls within the manufacturer's permitted ambient conditions instead of assuming colder surroundings guarantee safe operation.
A separate thermometer makes temperature checks easier to interpret. This guide to a Wi-Fi refrigerator thermometer pair can help you assess whether remote monitoring suits a kitchen and secondary-fridge setup.
Use a practical maintenance schedule
As a starting household routine, wipe handles weekly, wash the exterior monthly, and review the interior quarterly. Those are planning intervals, not reasons to postpone visible spills: clean food leakage promptly, and deal with raw-meat contamination when it happens.
Adjust the routine to actual use. A shared family fridge may need frequent handle attention, while a lightly used drinks fridge may need more checking for forgotten contents than fingerprint removal.
The job is done when food-contact surfaces are clean and residue-free, removable parts are dry, and the cabinet is holding its proper temperature. If pits, coating damage, or deep scratches remain, stop buying stronger cleaners and decide whether the finish needs repair or replacement.
Celmin publishes practical appliance reviews, buying guides, and troubleshooting advice for Canadian households, with attention to local availability and small-kitchen trade-offs. Visit Celmin to compare refrigerator-monitoring tools and kitchen appliances before spending money on an upgrade your current setup may not need.
Sign up or sign in to join the conversation.