
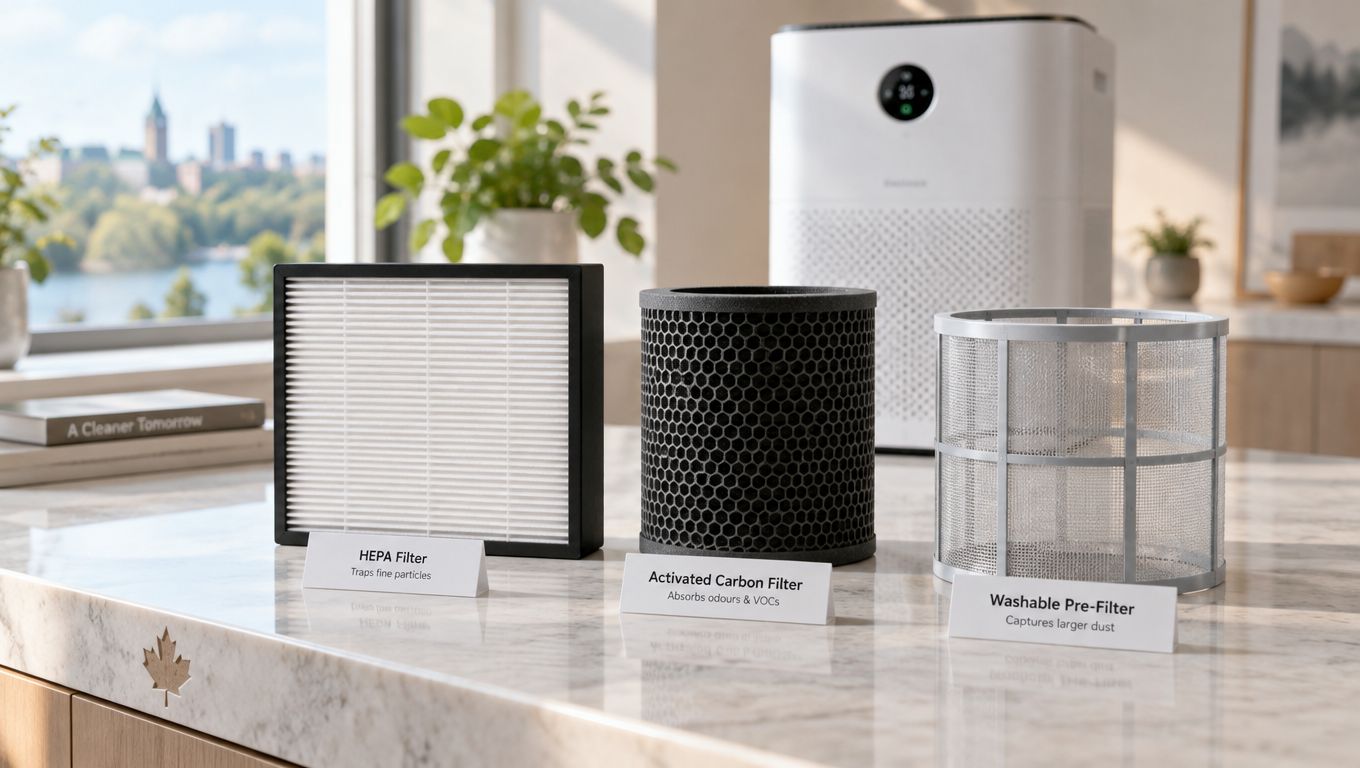
You switch on the air purifier after a smoky summer afternoon, or leave it running beside the bed through a dry Canadian winter. The fan still turns, the display still glows, and yet the room doesn't feel noticeably fresher. When you open the compartment, the filter is grey with dust, pet hair, or smoke residue.
Buying the purifier was only the first step. The replacement filter determines whether the machine can keep moving air through its media, maintain its seal, and deliver the clean-air performance promised on the box. For Canadian households, the sensible comparison isn't just the filter's CAD price. It also includes model compatibility, airflow resistance, filter availability, replacement timing, and recurring cost.
Table of Contents
- Why Filter Replacement Matters More in Canada
- Common Air Purifier Filter Types Explained
- Pre Filters, HEPA, and Activated Carbon Layers
- How Airflow and CADR Affect Filter Performance
- How to Identify the Correct Replacement Filter
- Generic Versus OEM Replacement Filters Compared
- Step by Step Filter Replacement Guide
- Maintenance Schedules for Canadian Seasons
- Signs Your Air Purifier Filter Needs Replacing
- Pricing and Availability Across Canadian Retailers
- Troubleshooting Common Filter Problems
- Quick Reference - Choosing the Right Filter Fast
Why Filter Replacement Matters More in Canada
A Vancouver condo with a shedding dog, a Toronto apartment beside renovation dust, and a rural home exposed to wildfire smoke can load the same purifier in very different ways. Canadian winter changes the workload too. Closed windows, active heating, and long operating hours in bedrooms or living rooms leave less opportunity for indoor air to dilute naturally.
Health Canada says a portable cleaner's results depend on airflow and filter efficiency, not the label alone. The agency also recommends source control and ventilation when conditions permit. Its Canadian guidance on portable air cleaners and indoor air quality explains how those measures work together.
Practical rule: A purifier can be running while an overloaded filter restricts airflow and reduces the performance you paid for.
Follow the manufacturer's cleaning and replacement instructions. During smoke events, federal guidance recommends MERV 13 or higher when an HVAC system can accommodate it. As routine benchmarks, pre-filters are changed two to four times per year, while higher-efficiency filters are generally replaced once annually. Treat those figures as starting points, not guarantees. Pets, renovation dust, wildfire smoke, heavy use, visible loading, and poor outdoor air can shorten the interval.
Replacement cost matters as well. A cheaper third-party filter is a poor bargain if its frame leaves gaps, its media creates excessive resistance, or its fit prevents the purifier from moving enough air. Check the model number, seal, and airflow before comparing CAD prices.
Common Air Purifier Filter Types Explained
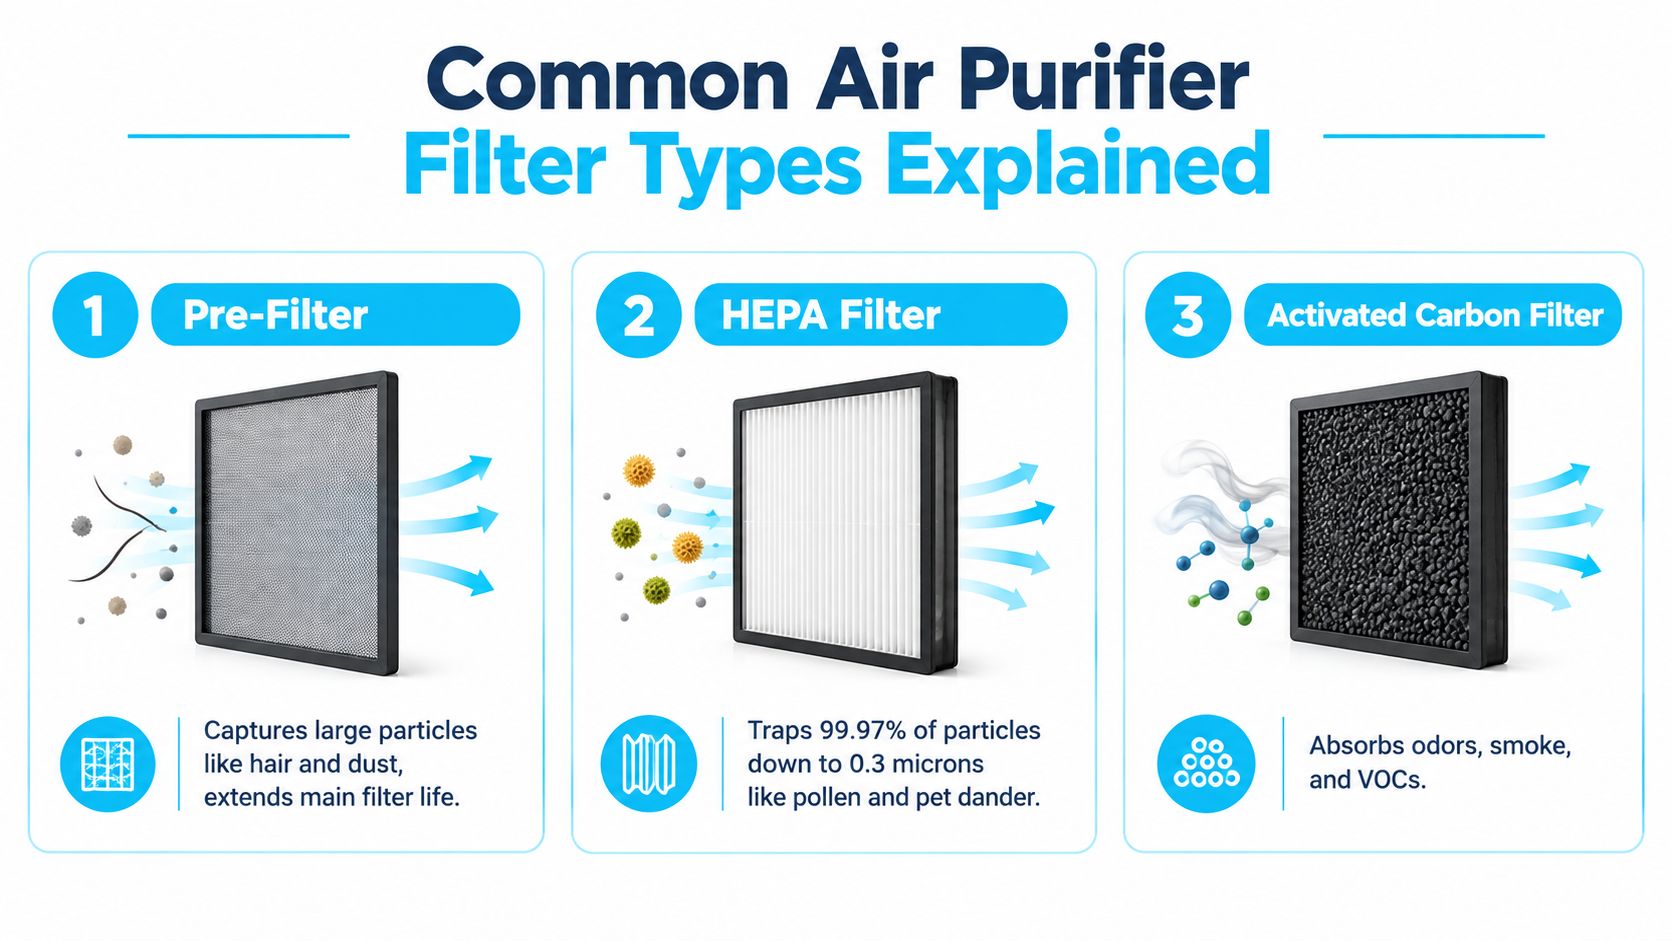
Filter layers have separate jobs, so a replacement that adds one layer but compromises another may not be an upgrade. A pre-filter catches larger material such as hair, lint, and visible dust before it reaches the denser main media. That helps preserve airflow and reduces the load on the deeper filter.
A HEPA filter targets fine airborne particles. Public Health Ontario's technical guidance defines a certified HEPA filter as one designed to remove at least 99.97% of particles at the 0.3-micrometre test size under standard testing conditions. The figure describes filter performance under testing conditions, not the total performance of every purifier in every room. The device's airflow, seals, operating setting, and room circulation still matter. The Public Health Ontario technical guidance on portable HEPA cleaners makes that distinction important.
Activated carbon serves a different purpose. It can address some odours and gaseous pollutants, but its usefulness depends heavily on the amount and condition of the carbon media. A thin carbon coating shouldn't be treated as equivalent to a deeper carbon bed.
Pre Filters, HEPA, and Activated Carbon Layers
Most cartridge-style air purifiers arrange the layers so incoming air meets the coarse material first, then the fine-particle media, with carbon included as a separate layer or combined with the main filter. That order isn't decorative. The pre-filter protects the denser media from rapid loading, while the HEPA layer handles particles that a mesh screen can't capture.
For a home with pets, the pre-filter is often the first part that needs attention. Hair and fur are easy to see, but the deeper concern is dander, which travels with airborne dust. A washable or vacuumable pre-filter can be useful if the manual permits that care. Don't rinse a main HEPA or carbon filter unless the manufacturer specifically says it's washable.
Carbon requires a more careful buying decision. Presence isn't the same as capacity. HealthLinkBC advises choosing a filter type according to the pollutant of concern and considering ongoing cost, energy use, and maintenance. Its guidance on indoor air cleaners and filter choices also supports separating particle filtration from odour and gas control. A carbon layer may help with cooking smells or some pet odours, but it isn't a substitute for particle filtration or ventilation.
For homes focused on shedding and dander, a practical comparison of purifier features appears in Celmin's air purifier guidance for pet hair. The useful question is whether the replacement preserves the full layer arrangement, not whether its listing uses more impressive wording.
How Airflow and CADR Affect Filter Performance
A filter can capture particles efficiently and still produce disappointing room cleaning if it restricts airflow too severely. Health Canada's selection guidance treats Clean Air Delivery Rate, or CADR, as a system-level measure, shaped by both airflow and filtration efficiency. The filter media alone doesn't own the purifier's room-size claim.
Many generic replacements go wrong here. A denser aftermarket cartridge may look appealing because it claims stronger particle capture, but excessive resistance can reduce fan airflow. A loose frame can create the opposite problem, allowing air to bypass the media rather than pass through it. Either way, the delivered clean air may fall short of what the original assembly provided. Health Canada's portable purifier selection document advises matching purifier selection to CADR and room size, while also reinforcing the importance of proper filter maintenance.
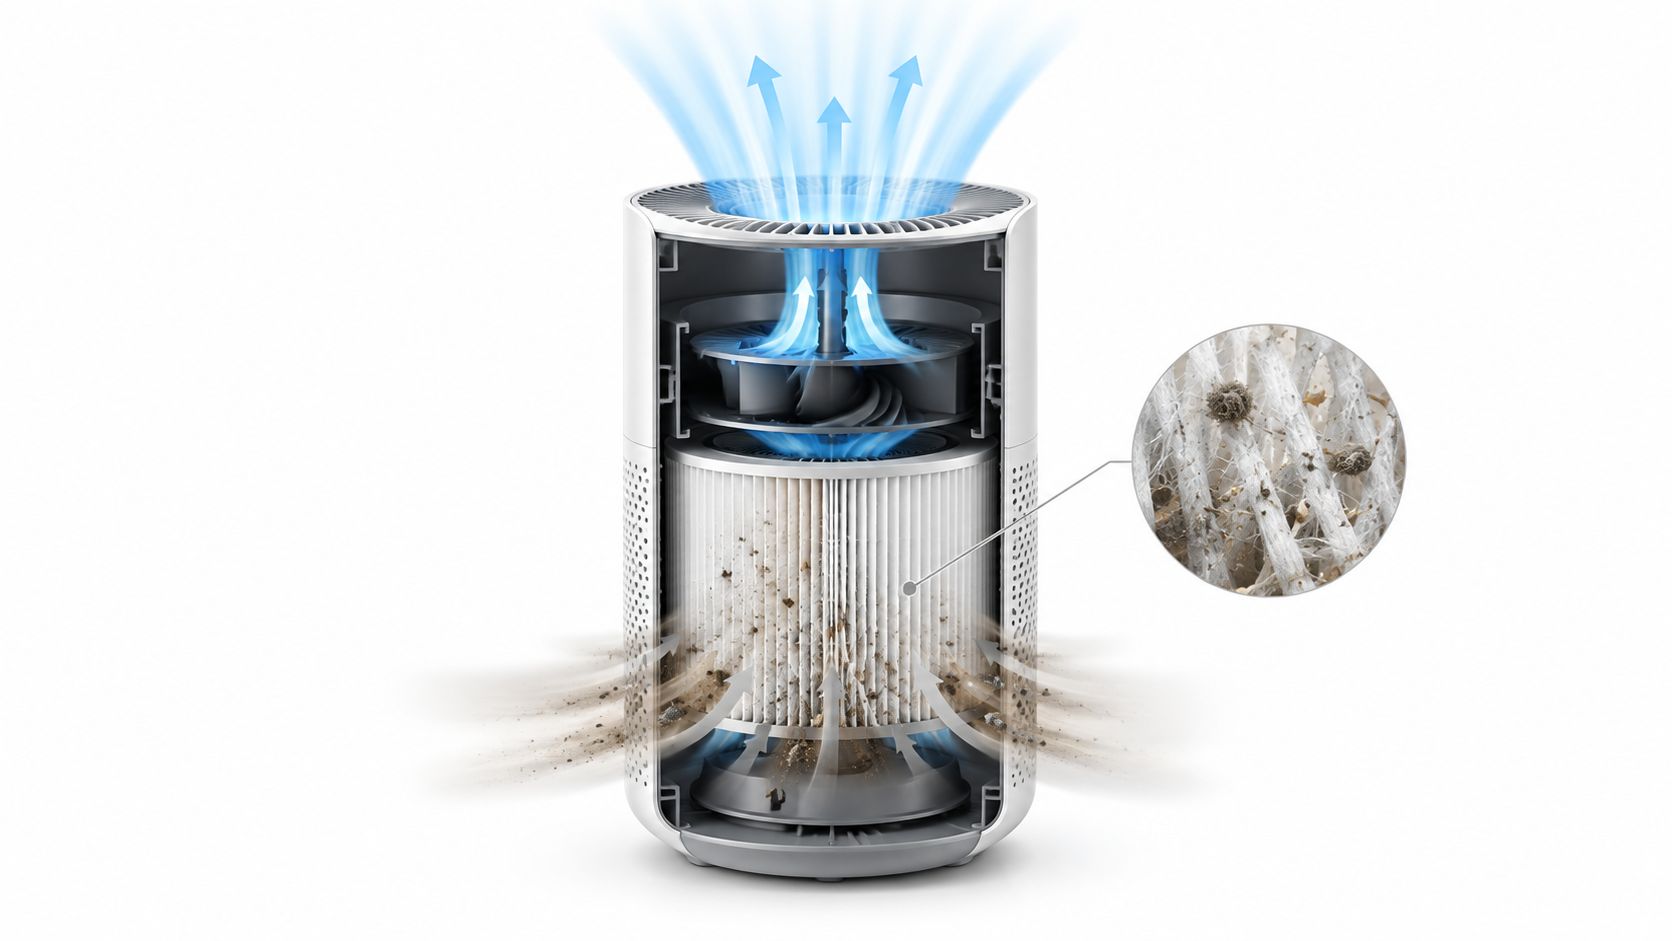
For dust-heavy rooms, the useful outcome isn't a marketing label. It's enough correctly filtered air moving through the space. Celmin's air purifier dust-removal guide is a relevant companion when the main concern is visible settling rather than odour.
The test that matters: If a new filter causes a sudden change in noise, airflow, or fan behaviour, treat that as a compatibility warning, not proof that the filter is more effective.
How to Identify the Correct Replacement Filter
Start with the purifier, not the marketplace search results. A photograph that looks identical can hide a different frame depth, seal design, airflow direction, or internal filter composition.
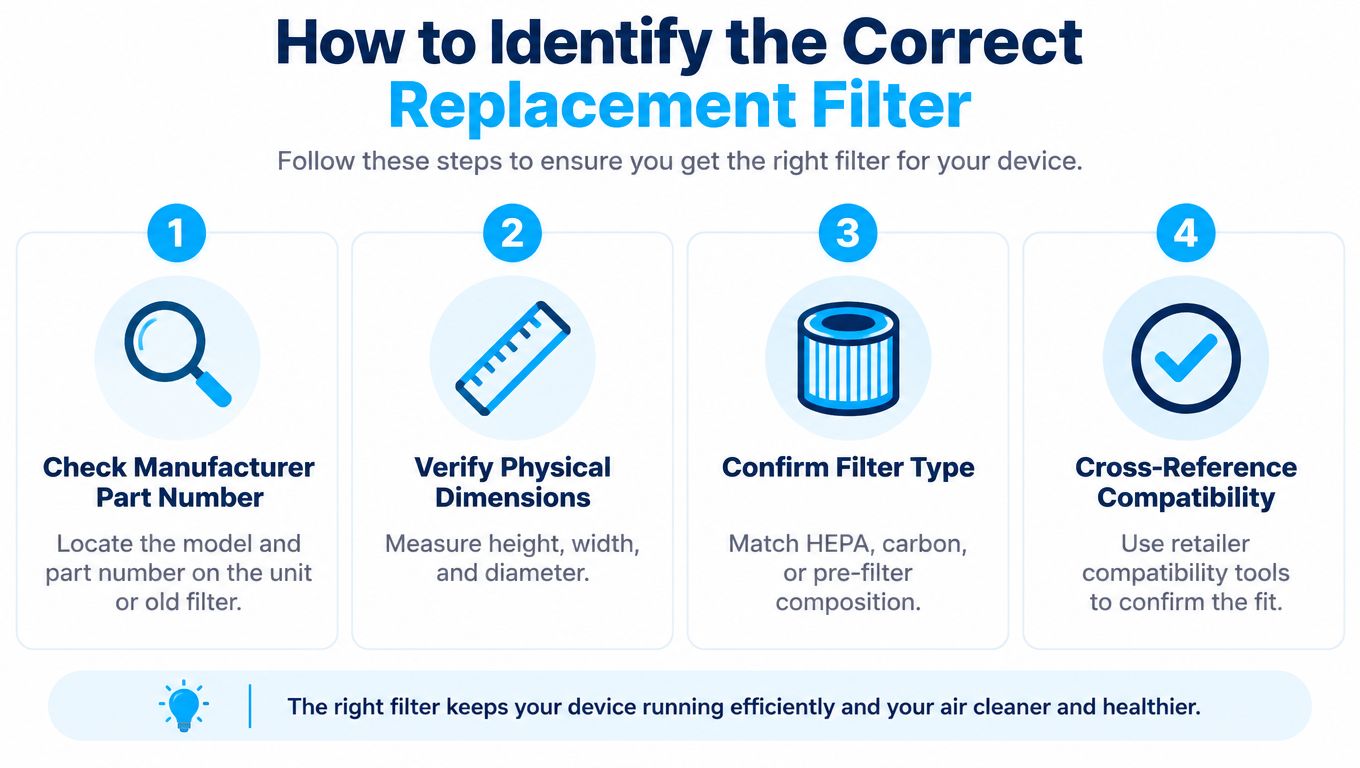
Find the model and part number. Look on the rear label, underside, filter door, manual, or old cartridge. The manufacturer's part number is more reliable than a listing title that says “fits most” models.
Verify the physical dimensions. Measure height, width, and depth, or the diameter of a cylindrical cartridge. A small gap can permit bypass, while an oversized filter may distort the door or block the intended airflow path.
Inspect the stack. Confirm whether the original uses a separate pre-filter, a HEPA layer, activated carbon, or a combined cartridge. Match the airflow direction and the position of each layer.
Cross-reference the exact model. Use the manufacturer's compatibility list or a retailer tool, then compare the seller's model list with the label on your purifier. Keep a record of the order part number in case the package arrives with ambiguous packaging.
Before checkout, check return terms and seller identity. A filter that technically slides into the compartment may still fail to seal against the housing. Health Canada's filter and purifier selection advice supports this model-specific approach because airflow and efficiency work together.
Generic Versus OEM Replacement Filters Compared
OEM filters usually provide the most predictable fit, airflow path, and warranty coverage. The higher CAD price may be reasonable when the purifier uses a tightly moulded cartridge, a sensitive filter sensor, or warranty terms that require approved parts. The trade-off is ongoing availability, plus the possibility that a proprietary cartridge costs more than expected over the appliance's useful life.
Generic filters can work well when the seller provides verified dimensions, construction details, model compatibility, and a clear return policy. Risk increases when a listing uses “HEPA-type” or “medical-grade” language without identifying the filter media, frame, seal, or likely airflow effect. A lower purchase price isn't a saving if the cartridge leaks around the edge or makes the fan struggle.
A Canadian federal procurement specification provides a useful comparison benchmark, although it is not a universal household requirement. It called for compatible filters combining HEPA and active-carbon filtration, with 99.97% removal for airborne contaminants, allergens, and particles 0.3 microns or larger, CADR above 300 m³/h, and a replacement cycle no longer than six months, unless the manufacturer substantiated a one-year interval. These requirements appear in the Canadian federal procurement specification.
Use that benchmark to ask better questions, not to assume every household filter meets it. Request documentation for the exact purifier model, check how the replacement seals against the housing, and compare the total CAD cost with the confidence that the cartridge will perform like the original. A cheaper filter can cost more if poor fit reduces airflow or forces an early replacement.
Step by Step Filter Replacement Guide
Turn the purifier off and unplug it before opening the housing. If the old filter is dusty or smoky, move the unit away from food-preparation areas and consider wearing a mask while handling it.
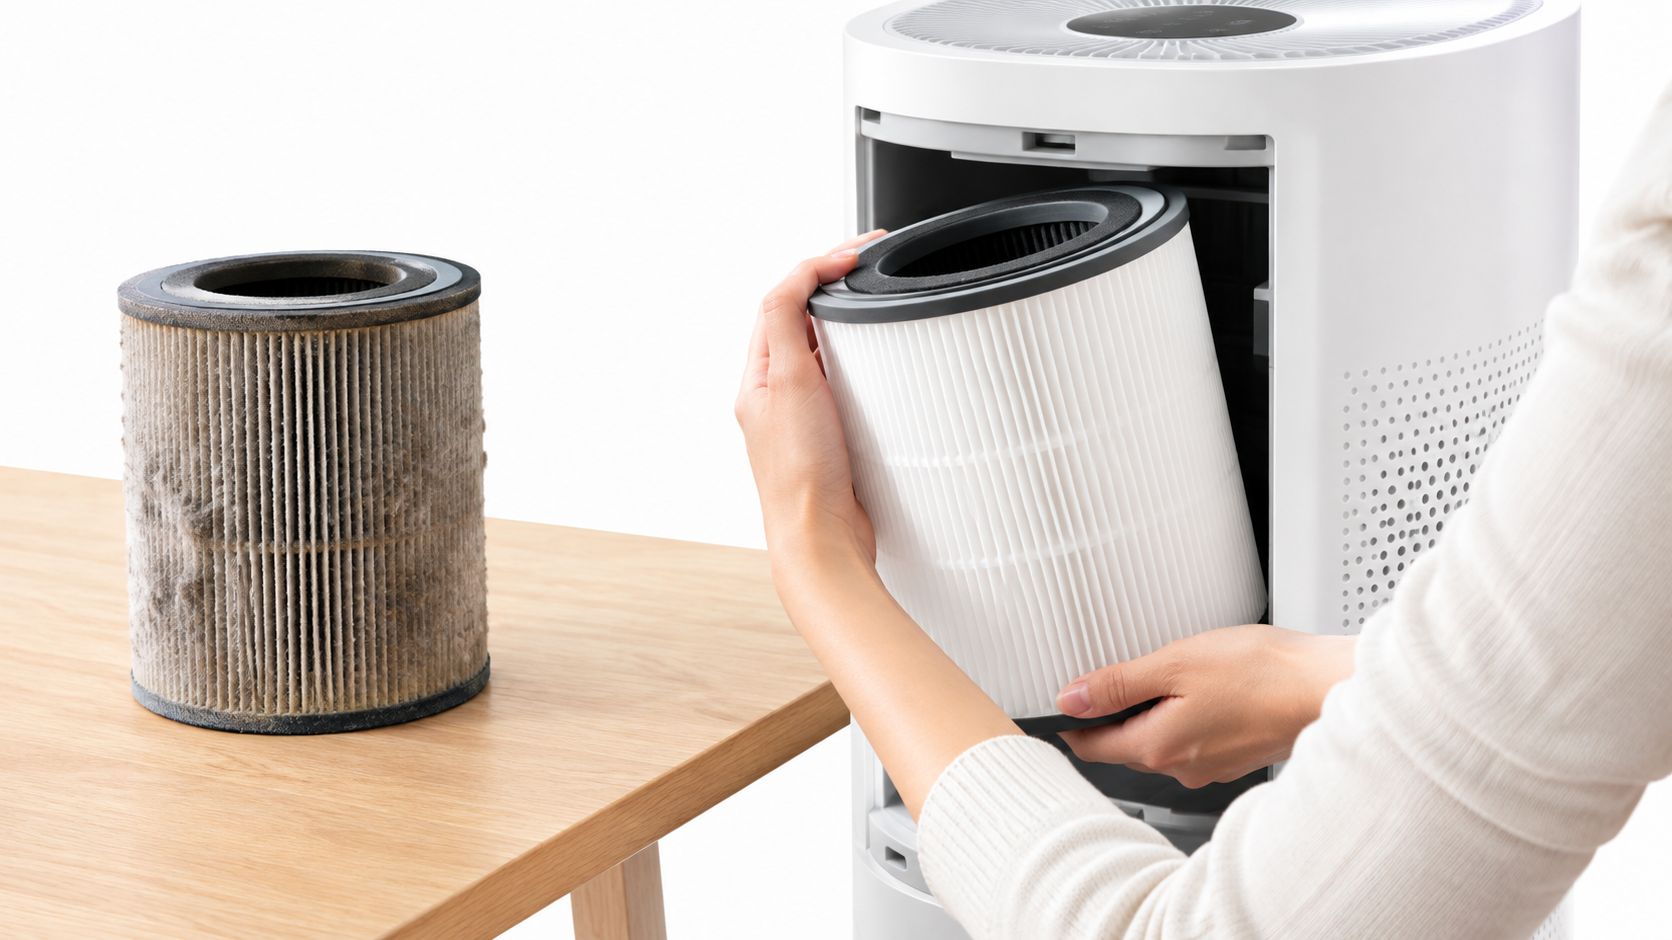
Open the compartment without forcing the door. Photograph the old cartridge before removal so you can copy the airflow direction and orientation. If the filter has arrows, a pull tab, or a fabric loop, use those features as installation references rather than relying on memory.
Remove the old filter carefully and inspect the housing. Look for packed dust around the gasket, torn foam, bent guides, or debris that could hold the new cartridge away from the frame. Don't wash disposable HEPA or carbon media. Clean only the parts the manual identifies as serviceable.
Insert the new filter firmly, but don't crush the pleats or force a cartridge into a slightly wrong opening. Check that the seal sits evenly around the perimeter and that the door closes without pressure.
Reconnect power and reset the filter indicator if the manual requires it. Run the purifier at a moderate setting, listen for rattling or a strained fan, and check that air exits from the expected outlet. A reset light only records the device's maintenance counter. It doesn't prove that the replacement fits correctly.
Maintenance Schedules for Canadian Seasons
Set the schedule by room use and pollutant load, not by the calendar alone. A bedroom purifier running through closed-window January nights collects different debris from a living-room unit used occasionally.
In January, inspect the intake and approved pre-filter regularly, especially in homes with forced-air heating, pets, carpets, or heavy textiles. Dust can settle on the intake and restrict air before the main filter appears dirty. Check that the cartridge still sits squarely against its frame seal after cleaning the housing.
Late spring brings pollen, while renovation dust can load media within days. During August wildfire smoke, inspect the filter after a smoke-heavy period and keep doors and windows closed when following federal cleaner-air-space guidance. A high-resistance replacement can also reduce airflow, so seasonal checks should include the filter's fit, pleat condition, and perimeter seal.
| Canadian condition | Maintenance response |
|---|---|
| January bedroom use | Inspect the intake and pre-filter during regular room cleaning |
| Spring pollen | Check for surface loading before high-use periods |
| Renovation dust | Inspect promptly and replace if media or seals are compromised |
| August smoke | Check the filter after smoke events and confirm unrestricted airflow |
| Pets or visible hair | Clean only approved pre-filter material |
Use the manufacturer's interval as a starting point, then shorten it when room conditions change. A calendar cannot compensate for a poorly sealed frame or a replacement that creates excessive airflow resistance.
Signs Your Air Purifier Filter Needs Replacing
The clearest warning is often a change in the machine rather than the filter indicator. Airflow feels weaker at the outlet, the fan sounds louder, or the purifier takes longer to make a noticeable difference in a small room. A filter can also look heavily loaded even when the reminder light hasn't appeared.
Lingering cooking smells or pet odours can point to exhausted carbon media, but odour alone doesn't prove the HEPA layer has failed. Conversely, a clean-looking filter can still have a seal problem or internal loading that isn't obvious from the front.
Use this quick check:
- Air movement: Compare the outlet with its normal behaviour, not with another model.
- Sound: Listen for a strained, higher-pitched, or rattling fan.
- Surface loading: Look for dust, smoke staining, or a blocked intake.
- Room response: Note whether familiar dust or odour problems return.
- Indicator status: Reset only after confirming the cartridge is correct.
A monitor can add context, but it won't replace physical inspection. Celmin's best air-quality monitor guide can help compare monitoring approaches. If the purifier smells electrical, overheats, or behaves erratically, unplug it and follow the manufacturer's service guidance rather than treating the issue as a filter reminder.
Pricing and Availability Across Canadian Retailers
Canadian shoppers often begin with the cheapest marketplace listing, but the filter's purchase price is only one line in the budget. Add the expected replacement frequency, shipping, return risk, and the cost of buying a second filter when the first one doesn't seal.
Amazon.ca can offer broad model coverage, while manufacturer stores and established Canadian appliance retailers may provide clearer part numbers and warranty support. Availability varies by purifier, so check whether the cartridge is stocked in Canada before committing to a device with an unusual format.
Use a simple CAD comparison:
| Cost item | What to check |
|---|---|
| Initial cartridge price | OEM or aftermarket, single or multipack |
| Ongoing replacement | Manufacturer interval and demanding conditions |
| Delivery | Canadian stock, shipping, and return terms |
| Performance risk | Dimensions, gasket, airflow, and documentation |
| Extra layers | Whether carbon is substantial or only a thin coating |
HealthLinkBC specifically advises considering ongoing cost, energy use, and maintenance when choosing filtration. That is why a slightly more expensive compatible filter can be better value than a bargain cartridge that restricts airflow, bypasses the frame, or needs replacement sooner.
Troubleshooting Common Filter Problems
Weak airflow usually starts with orientation, a blocked pre-filter, or a cartridge that is too dense for the purifier. Remove power, compare the arrows with the manual, and check that the gasket sits flat.
A new carbon filter may have a temporary manufacturing smell, but a strong persistent odour suggests damaged media, incorrect placement, or packaging that wasn't removed. Follow the product instructions and return the cartridge if the smell doesn't settle.
If the warning light remains on, use the model's reset procedure after confirming the filter part number. If the unit still rattles or struggles, stop using the questionable cartridge. A third-party filter isn't acceptable merely because it fits inside the door.
Quick Reference - Choosing the Right Filter Fast
A renter in a small apartment may need a straightforward particle-focused cartridge, while a detached home near seasonal smoke may place more emphasis on airflow, filter condition, and timely inspection. A pet household may benefit from a protected pre-filter, but it still needs a correctly sealed fine-particle layer.
Use this final checklist before ordering:
- Match the model: Record the purifier's exact model and approved part number.
- Check the fit: Verify dimensions, frame depth, gasket contact, and airflow direction.
- Separate functions: Choose HEPA media for airborne particles and carbon for some gases and odours.
- Protect CADR: Avoid a replacement that adds resistance without credible performance documentation.
- Plan maintenance: Use the manufacturer's schedule, then adjust for pets, smoke, renovations, and visible loading.
- Calculate total cost: Compare recurring CAD purchases, availability, shipping, and return protection.
- Inspect after installation: Confirm normal airflow, sound, door closure, and indicator reset.
The purifier in the winter bedroom or smoke-affected living room can keep doing useful work, but only when air passes through the intended media. Treat replacement filters as operating components, not disposable accessories, and the buying decision becomes much clearer.
Celmin publishes Canadian buying guides and comparisons that help you check filter compatibility, replacement intervals, CAD pricing, and local purchasing options for home air-quality devices. Visit Celmin before ordering your next air purifier replacement filter, and compare the ongoing ownership cost alongside the appliance itself.
Sign up or sign in to join the conversation.